|
|
I'm guessing that you've had at least one piece of clothing meet an unfortunate incident with a blob of dripped sauce, bit of smeared paint, or spilt cleaning product, which just won't wash out? Well, that need not be the end of it's wearable life! With a little thread and a needle, you can bring new life to your otherwise "well, I guess that's a DIY and gardening top now" and it's a simple low stress way to try your embroidery skills out. 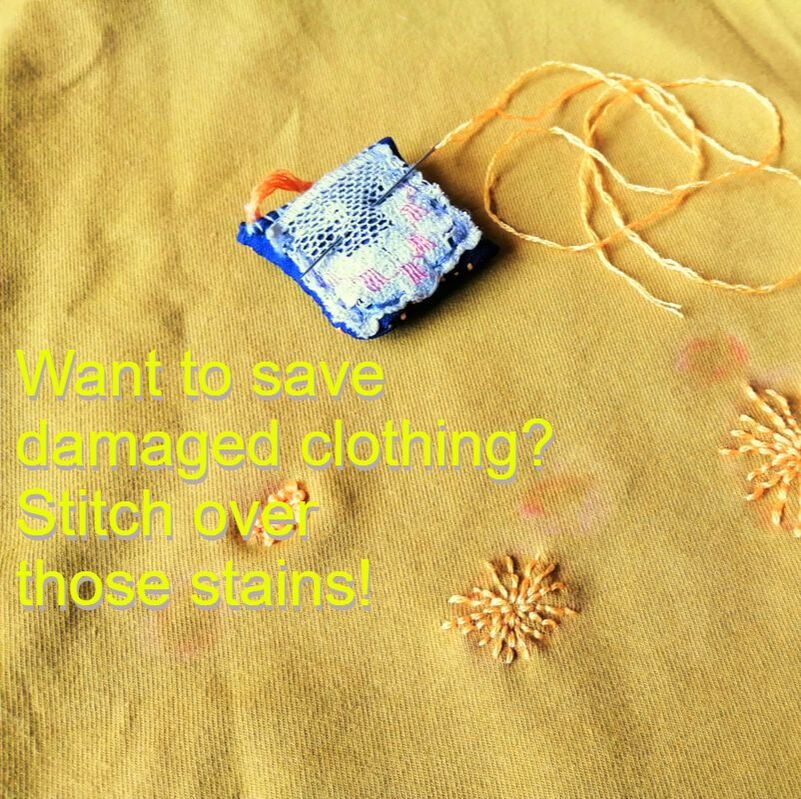 Many years ago my mum accidentally dotted a brown top with bleach, so she turned the little white circles into flowers, by stitching around them with a pink thread. This very visible mend made a feature of the original problem, and gave her a reason to personalise an otherwise plain top. Recently I splashed a favourite yellow top of mine with oil while cooking. Just a simple jersey t-shirt, I was still sad to see it stained, and decided to save it with that sewing trick of my mum's. 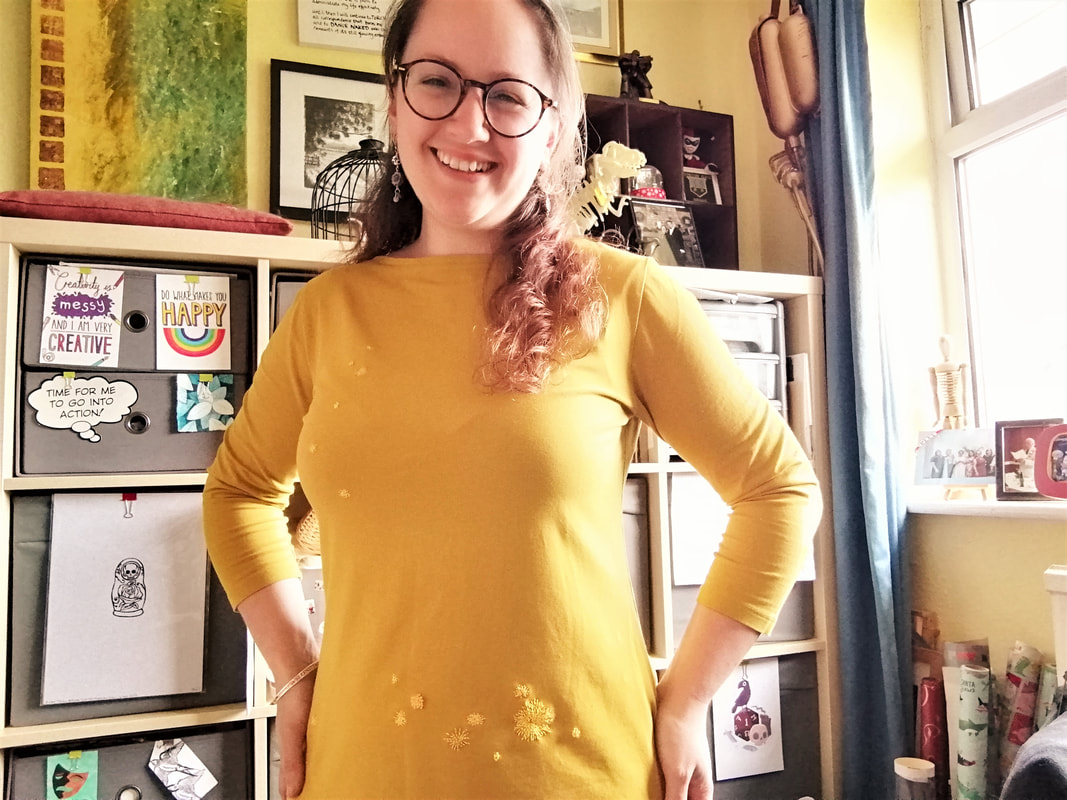 1. Decide if you want your embroidery thread colour to contrast your material colour, or match it - You can create a great look with a bold contrast, or even using multiple colours to create patterns or different patches. Keeping the same colour means that pattern and texture stands out. 2. If your stain(s) isn't a very contrasting colour to the material, it can be helpful to outline the area with chalk or a soft pencil first, so you can be sure your stitches cover the stain. As you gradually sew over the stain it can be surprisingly easy to miss the edges, and later realise that you left some stain visible. 3. Depending on the location, size or shape of the stain(s), you may want to not only cover them, but also stitch extra areas and details on unstained areas. It's a good idea to try your clothing on, and see where attention will be drawn to the fixes. There were two oil spots higher up on my top, so I added more, because it would have looked strange with only two dots on my chest! 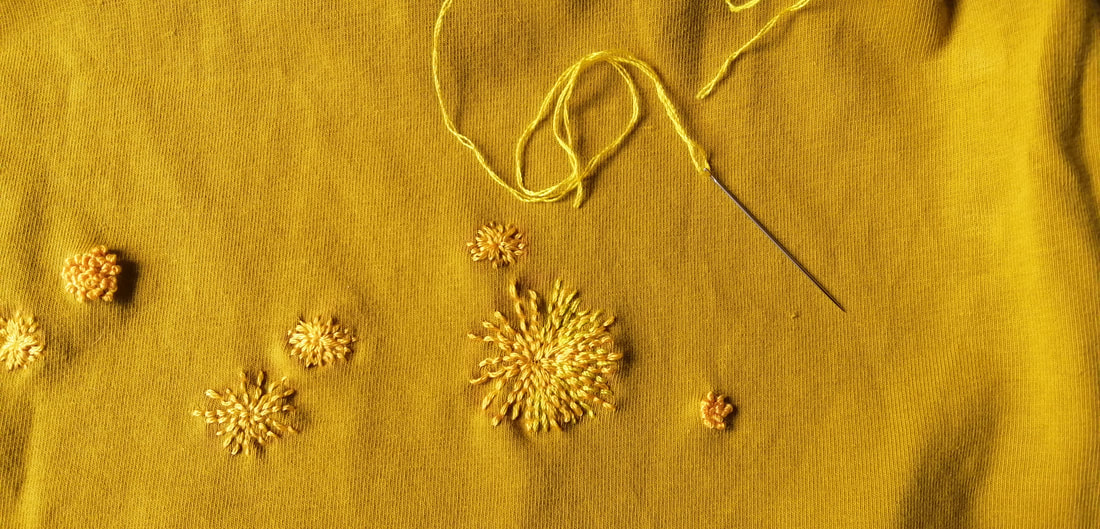 4. Depending on the stain, decide if you want to cover it or stitch around it to make it a feature, like my mum making flowers from white spots. Even if you only know backstitch, you can do quite a lot! I created these... urm, explosion thingys, by starting in the centre and taking a line of backstitch out, then back in, then out, in, out (don't shake it all about). For the smaller stains I used French Knots, adding extra texture. 5. No idea about stitches? Well I honed my French Knot skills thanks to Jenny Hart's fantastic easy to follow instructions on Sublime Stitching. Just pop to her site, see what stitch style grabs your fancy, and give it a go! https://sublimestitching.com/pages/tutorials 6. Once you think you know how you want to stitch those stains, and you're prepared to start, remind yourself that this isn't rocket science, it's a bit of fun, and you're bound to end up with someone better than you started with!  7. Done? Try on your clothing and see how your fixes sit (no decent mirror? Use the timer on a camera to get selfies for different angles!)- Do you want to add more detail before you pack up? A little more work to some of the fixes? 8. Pop your clothing carefully through the wash before you wear it. This will help remove any chalk or pencil if you used it, and to smooth out the embroidery.
0 Comments
Leave a Reply. |

Welcome to Lisa's Perfidious Jewellery adventures. Unusual yet wearable accessories to help you share your personality with the world, plus cats, tea, and craft ideas! Categories
All
Archives
February 2024
|